오늘은 아래 4개의 강의를 들었습니다ㅏ
[Grid&Flex1-4] 너무나도 편한 flex
https://youtu.be/58aMVHkh1Lc?si=6Zz9SbL9bQ1Ta8Tm
[Grid&Flex1-5] display: none을 쓰면 안 되는 이유(feat. 클래스의 첫 등장)
https://youtu.be/t1Yb10OphaI?si=3oEH4Ms1LL6-4yH-
[Grid&Flex1-6]이미지 스프라이트와 background와 ::before, ::after
https://youtu.be/dClVEOYOHwU?si=nO7J8IIWdUdIDe0W
[Grid&Flex1-7]제자리에서 조금씩 움직이기(position: relative)
간 단 요 약
1. Flex 사용하기
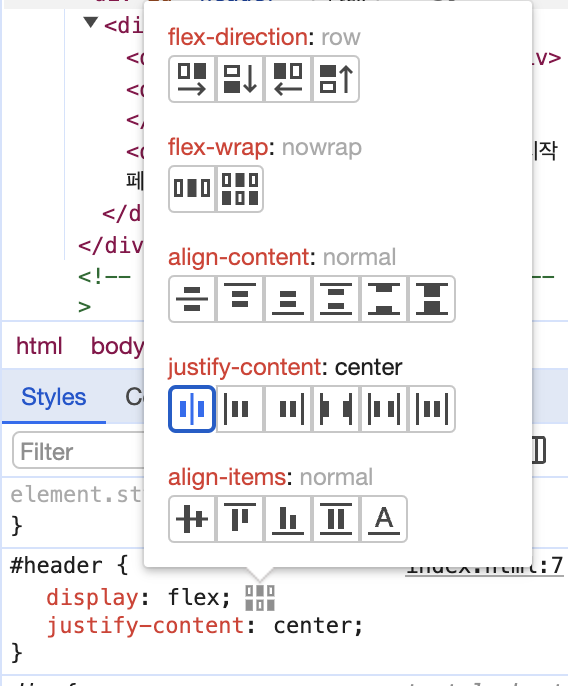
위처럼 개발자 도구에서 미리 Style을 적용해볼 수 있습니다.
이번에는 Flex를 적용해보았는데요 !
📍Flex의 경우, 자식 태그를 배치 할 때 편합니다.
#header {
            display: flex;
            justify-content: center;
        }
위와 같이 Flex를 사용하여 헤더를 가운데로 정렬할 수 있습니다.
#header-search{
            width: 586px;
            height: 100%;
            display: flex;
            align-items: center;
            flex: 1;
        }
Flex를 사용하여 '네이버 시작하기'를 오른쪽 끝에 붙이고 싶습니다.
이럴 경우, search 바의 왼쪽을 최대한 늘리면 되는데요 !
Flex 값을 1을 주면 부모 내에서 차지할 수 있는 최대한의 너비로 늘어나
옆의 메뉴가 오른쪽 끝에 붙게 됩니다.
align-items가 center이면 세로로 가운데 정렬이 가능하게 됩니다.
이처럼 Flex는 형제 간에 영향을 미칠 때 주로 사용되며,
flex 값을 준 비율대로 너비가 늘어나게 됩니다.
ex) flex 값 1 : 2 이면 너비가 1 : 2 비율로 늘어나게 됨
#header-center {
            width: 1130px;
            height: 160px;
            display: flex;
            background-color: yellow;
        }
다음과 같이 요소 혼자만 Flex가 존재할 경우, 그 자리를 혼자 다 차지하게 됩니다.
2. blind 하는 법
<body>
<div id="header">
<div id="header-center">
<div id="header-logo">
<a href="#">
<span class="blind">로고</span>
</div>
</div>
<div id="header-search">
<div>검색창</div>
</div>
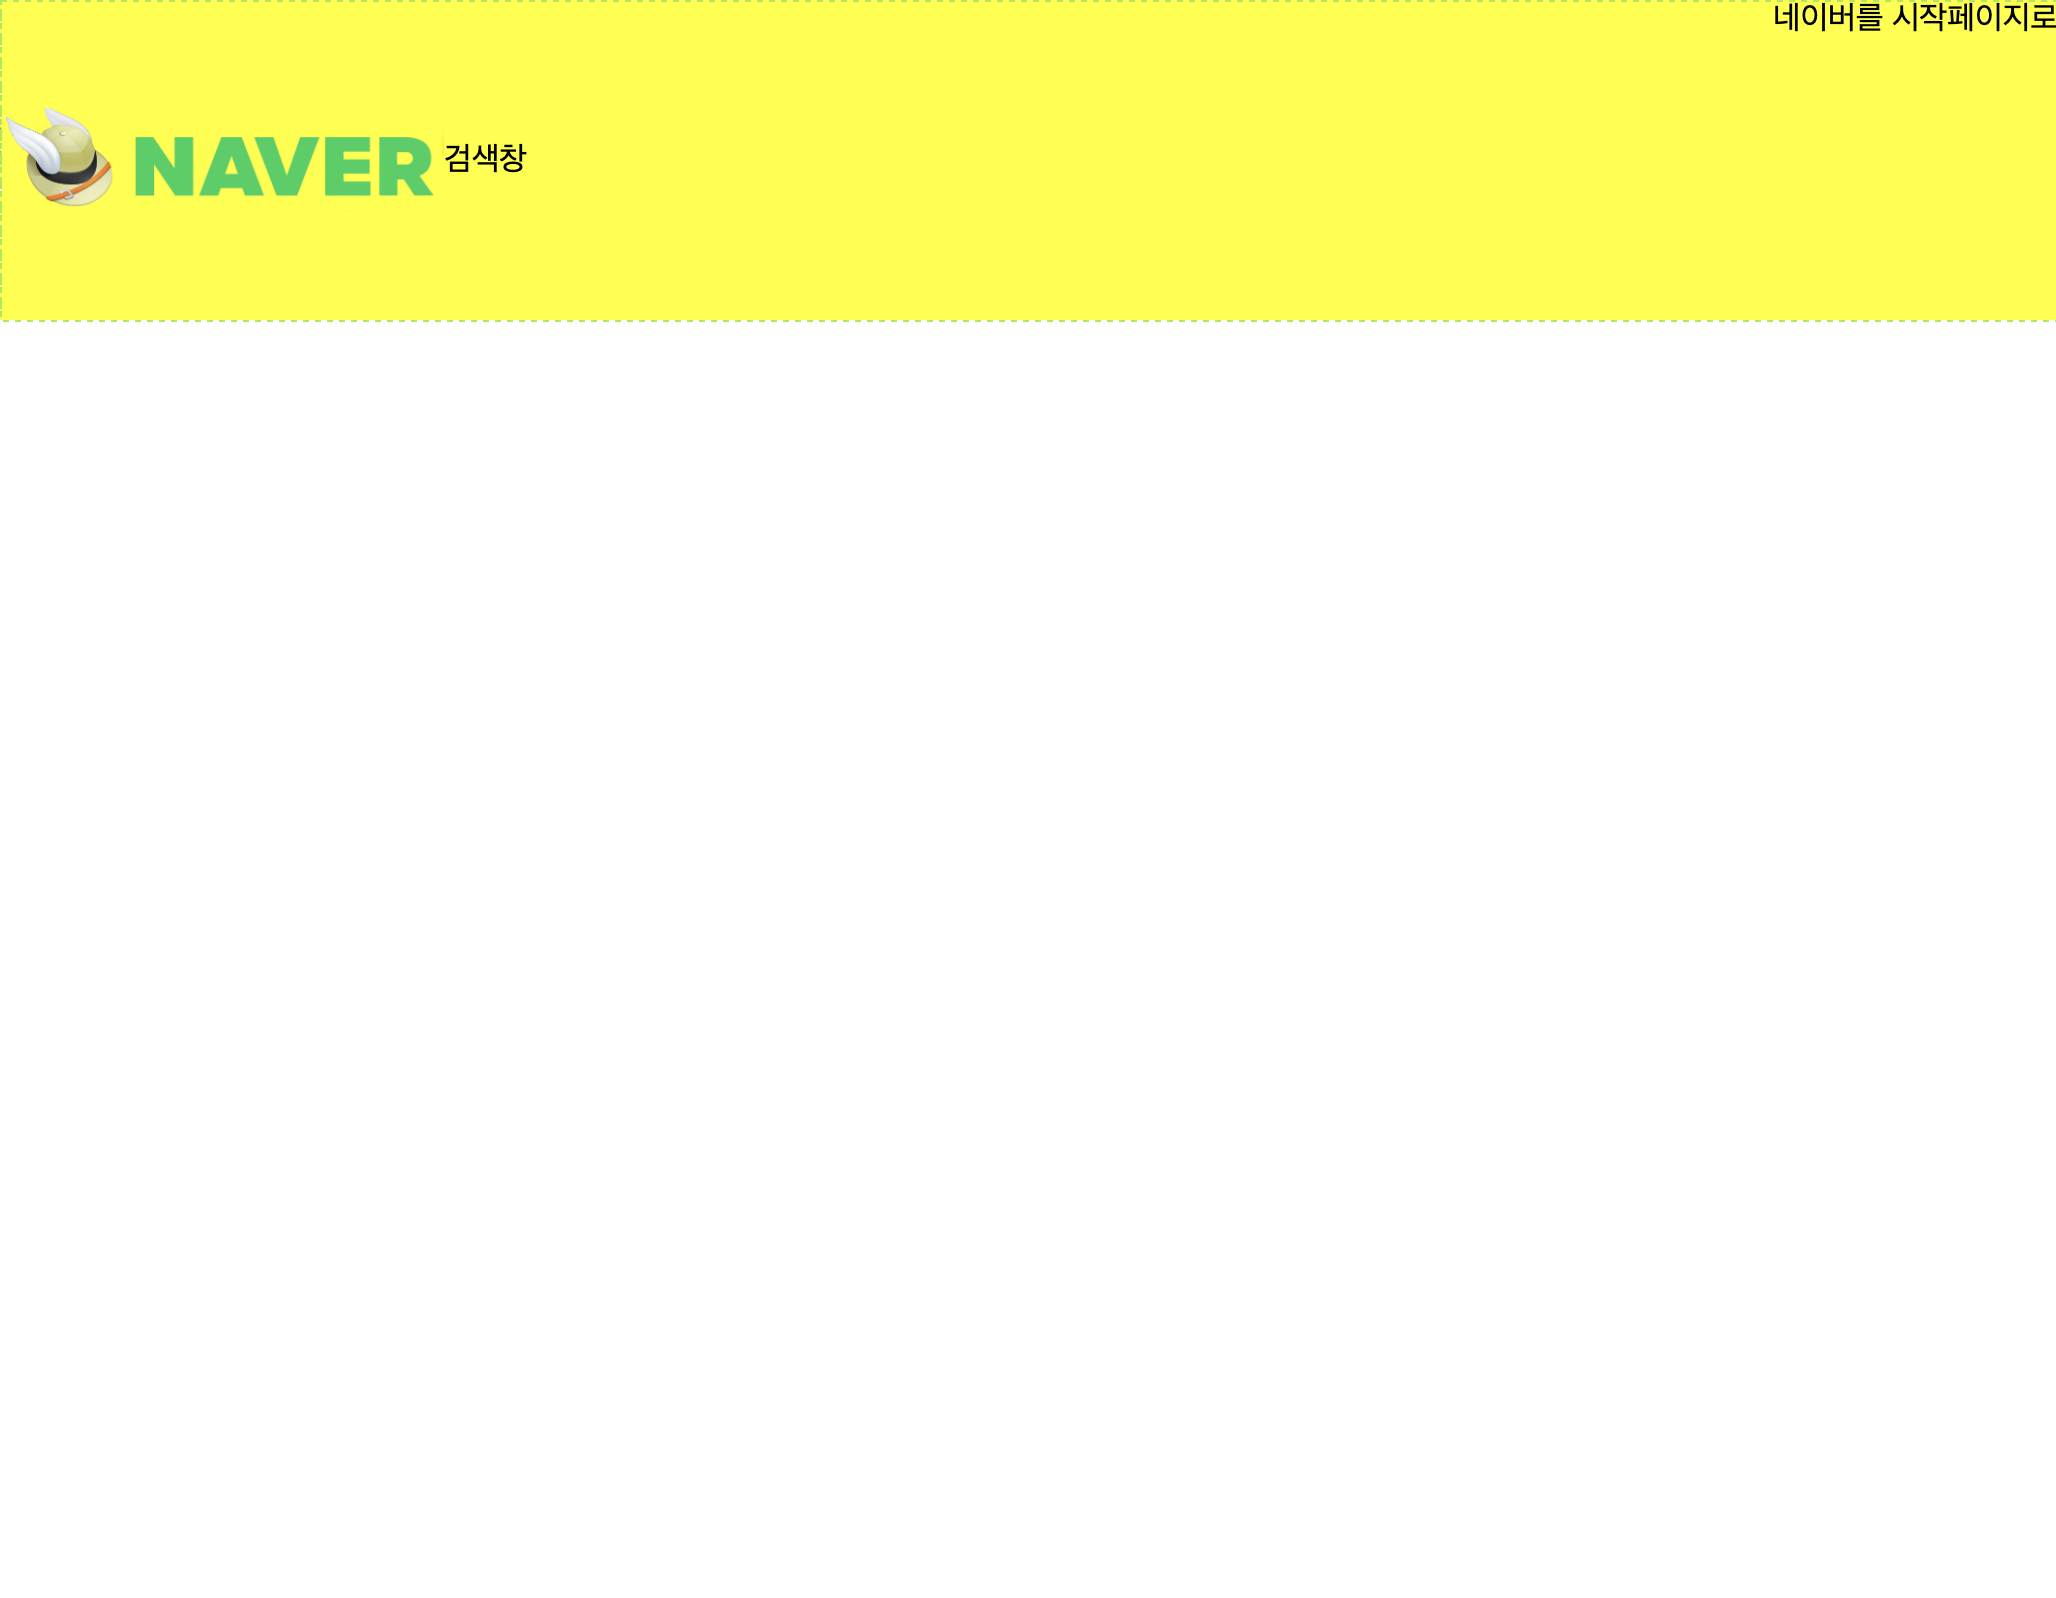
<div id="header-home"> 네이버를 시작페이지로 </div>
</div>
</div>
</body>blind는 시각장애인 분들을 위해서 사용이 됩니다.
즉, 위의 코드에서의 blind는 화면에는 '로고'가 보이지 않지만
스크린 리더기는 인식을 하여 '로고'라고 읽어줄 수 있도록 하는 역할을 합니다.
보통의 경우, 아래 두 가지의 경우를 생각하는데요,
📍 visibility: hidden;
이 경우, 공간은 차지하지만 보이지 않으며 공간을 작게 차지하게 만듭니다.
📍 display: none;
이 경우, 아예 공간 자체도 없애 버리는 것인데요.
이럴 경우, 스크린 리더기도 인식을 못하는 사태가 발생합니다.
.blind{
            position: absolute;
            clip: rect(0 0 0 0);
            width: 1px;
            height: 1px;
            margin: -1px;
            overflow: hidden;
        }
따라서 다음과 같이 CSS를 적용함으로써
가장 작게 공간을 차지하되, 보이지 않게 만들어줍니다.
( 참고로 class는 앞에 . 을 찍어주면 됩니다. 아이디와는 다르게 여러번 쓸 수 있습니다. )
📍span : 단순 텍스트나 텍스트에 관련된 마크업 등 구문 콘텐츠에 스타일이나 속성의 범위를 적용하기 위해 감싸주는 태그
3. 이미지 스프라이트와 background
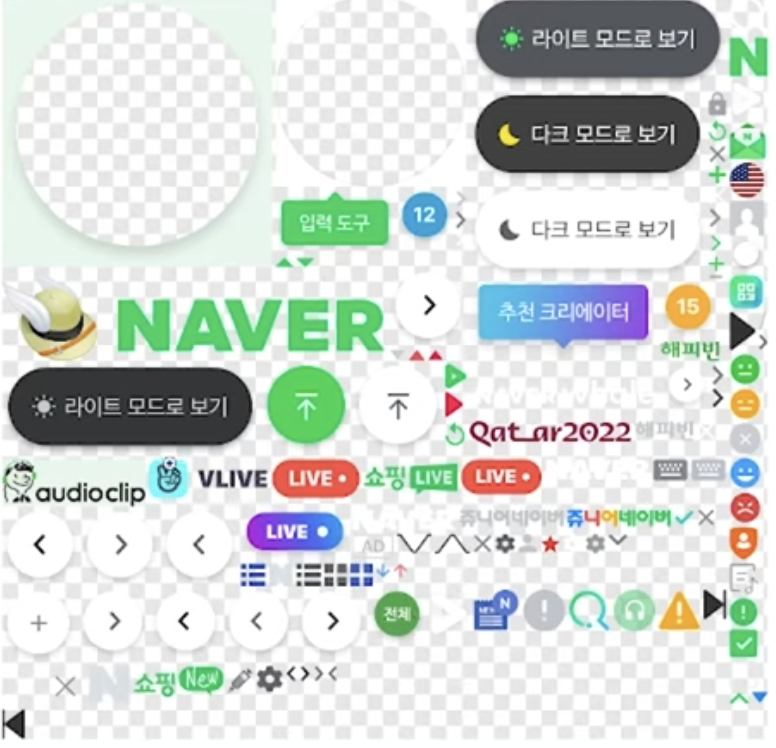
네이버 개발자 도구에서 다음과 같이
네이버 홈에서 사용하는 모든 로고가 모인 이미지를 확인할 수 있습니다.
이처럼 모든 로고를 하나에 다 담은 이유는
이미지는 서버에 올려지는데, 하나로 모아놓으면 이를 위해 서버에 1회만 요청하면 되기 때문입니다.
#header-logo a {
width: 222px;
height: 52px;
}
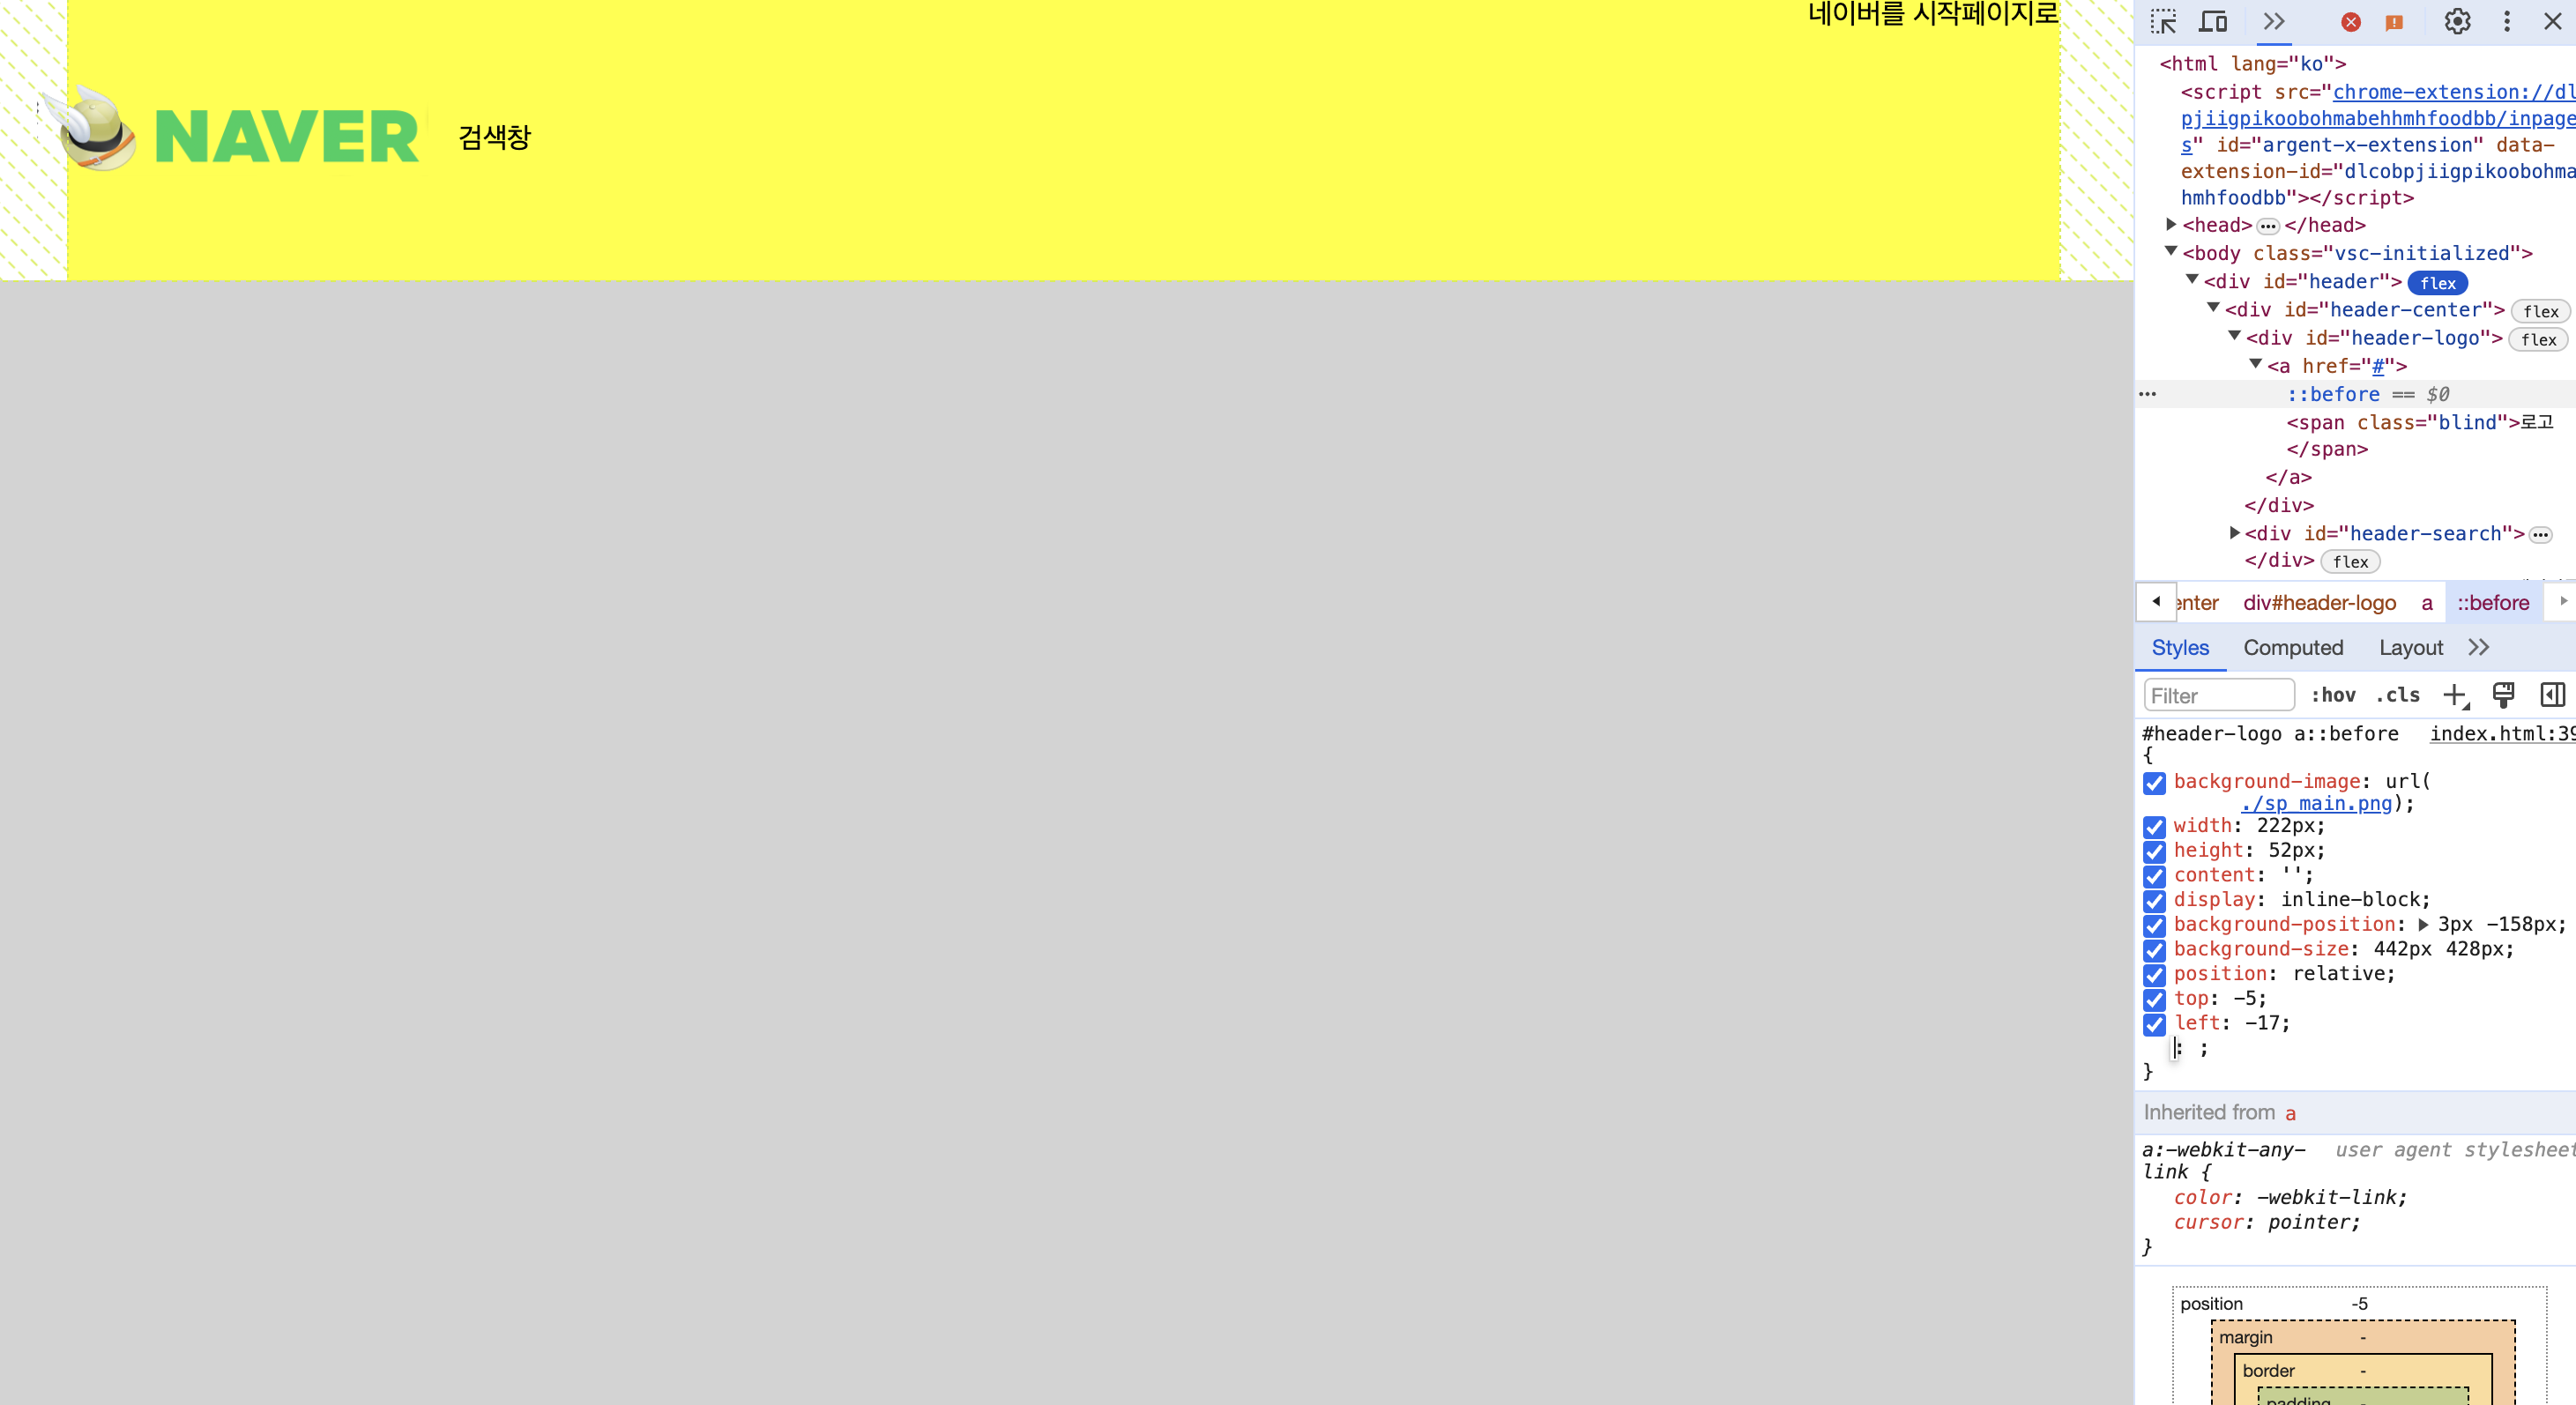
#header-logo a::before {
background-image: url(./sp_main.png);
width: 222px;
height: 52px;
content: '';
display: inline-block;
background-position: 3px -158px;
background-size: 442px 428px;
position: relative;
top: -5;
left: -17;
}
다음과 같이 a 태그에서는 before와 after에 대한 효과를 만들 수 있습니다.
이 때, content 요소를 추가해줘야 before, after 효과가 실행될 수 있습니다.

위와 같이 이미지를 조정할 때 미리 개발자 도구에서 확인을 하면 좋습니다.
background-position으로 이미지 위치를 조정할 수 있고,
background-size로 사이즈를 조정할 수 있습니다.
요소가 자기 공간에서 왔다리 갔다리하게 만들고 싶다면 !
position을 relative로 설정한 뒤 top, left, right 등으로 조정을 해주면 됩니다.
4. 위의 여백 없애기
html, body {
            margin: 0;
            padding: 0;
        }
다음과 같이 설정하면
위처럼 위의 여백을 없앨 수 있습니다 !
5. 스크롤 만들기
<body>
    <div id="header">
        <div id="header-center">
            <div id="header-logo">
                <a href="#">
                    <span class="blind">로고</span>
                </a>
            </div>
            <div id="header-search">
                <div>검색창</div>
            </div>
            <div id="header-home"> 네이버를 시작페이지로 </div>
        </div>
    </div>
    <div id="main"></div>
</body>
다음과 같이 아래 main div를 생성하고,
#main{
            height: 9999px;
            background-color: lightgray;
        }
높이를 쭈우욱 늘리면
자동으로 스크롤이 생성됩니다.
스크롤까지 반영해서 너비를 설정해야 하기 때문에
미리미리 해놓는 것이 좋습니다 !
전 체 코 드
<html lang="ko">
<head>
    <meta charset="UTF-8">
    <meta name="viewport" content="width=device-width, initial-scale=1.0">
    <title>NAVER</title>
    <style>
        html, body {
            margin: 0;
            padding: 0;
        }
        #header {
            display: flex;
            justify-content: center;
        }

        #header-center {
            width: 1130px;
            height: 160px;
            display: flex;
            background-color: yellow;
        }

        #header-logo, #header-search, #header-home {
            display: inline-block;
        }

        #header-logo {
            width: 235px;
            height: 100%;
            display: flex;
            align-items: center;
        }

        #header-logo a {
            width: 222px;
            height: 52px;
        }

        #header-logo a::before {
            background-image: url(./sp_main.png);
            width: 222px;
            height: 52px;
            content: '';
            display: inline-block;
            background-position: 3px -158px;
            background-size: 442px 428px;
            position: relative;
            top: -5;
            left: -17;
        }

        .blind{
            position: absolute;
            clip: rect(0 0 0 0);
            width: 1px;
            height: 1px;
            margin: -1px;
            overflow: hidden;
        }

        #header-search{
            width: 586px;
            height: 100%;
            display: flex;
            align-items: center;
            flex: 1;
        }
        #main{
            height: 9999px;
            background-color: lightgray;
        }

    </style>
</head>
<body>
    <div id="header">
        <div id="header-center">
            <div id="header-logo">
                <a href="#">
                    <span class="blind">로고</span>
                </a>
            </div>
            <div id="header-search">
                <div>검색창</div>
            </div>
            <div id="header-home"> 네이버를 시작페이지로 </div>
        </div>
    </div>
    <div id="main"></div>
</body>
</html>'개발 NOTE ✏️' 카테고리의 다른 글
| [네이버 따라 만들기] Grid & Flex 3️⃣ (0) | 2024.03.13 |
|---|---|
| [네이버 따라 만들기] Grid & Flex 1️⃣ (2) | 2024.03.07 |
| 이전 Commit으로 되돌리기 (0) | 2024.03.07 |
| [학회 홈페이지 만들기] 1️⃣ NestJS 프로젝트 세팅 (2) | 2024.03.07 |


